
Step-by-step guide for setting up Hyper-V USB Passthrough
Table of Contents
Abstraction of computing, storage spaces, and networking resources, are the key features of virtualization technology. This groundbreaking technology enables users to make a virtual version of their existing physical hardware.
Table of Contents
While virtualization technology has become quite easy to configure, there are still some drawbacks. For example, not enabling USB passthrough in a less complicated way!
However, there are some ways you can initiate the USB passthrough in Hyper-V environments. Let’s dive into the details, why, and how you can do that!
Why Do You Need USB Passthrough in Hyper-V?
There can be multiple reasons why you would rely on USB passthrough in Hyper-V. Starting from basic requirements for VMs to testing purposes, there are loads of examples of why you might need to rely on a USB drive.

Hyper-V USB passthrough
For now, there is no native support for USB passthrough in Hyper-V which can be a hassle for many. However, there are multiple ways you can initiate Hyper-V USB passthrough–
- Enable Enhanced Session Mode
- Run the Remote Desktop Protocol (RDP) session
- Install network-based USB solutions
- Install software-based USB solutions
In this post, we will focus on the first two methods because those two don’t require any reliance on external software. So, let’s start with the simple guides to configure USB passthrough in Hyper-V!
Hyper-V USB Passthrough with Remote Desktop Connection
Before we get into the main process, you need to fill out some requirements. Here’s what you need to do if you want to enable USB passthrough via remote desktop connection-
- For Virtual Machine Connection (VMConnect) to work, your computer must be operated on Windows Server 2016, Windows 10, Windows 8.1, Windows Server 2012 R2, Windows Server 2012, and Windows 8.
- The VM used to connect to the USB drive must be operated on Windows Server 2016, Windows Server 2012 R2, Windows 10, or Windows 8.1.
- Remote Desktop Services must be enabled on the VM which you would like to connect to.
Does your hardware match these requirements? If so, then continue to the main process now-
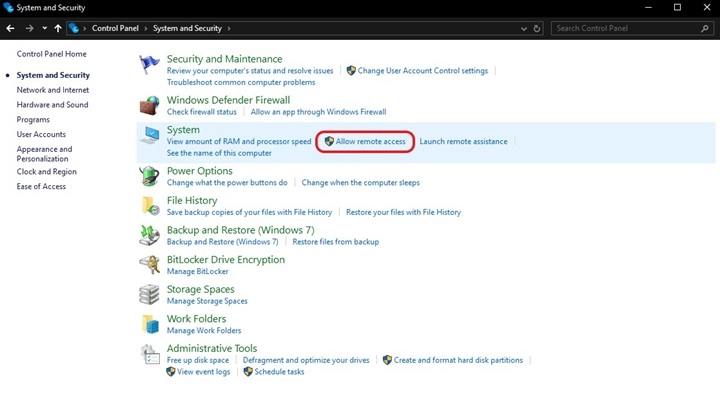
Step 1: First, you need to enable the remote desktop connections on your VM. Go to Control Panel > System and Security > Allow remote access. You will need administrative control to enable this setting.
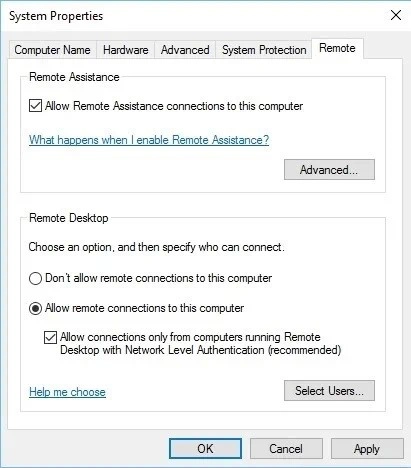
Step 2: After clicking the option, the system properties menu will pop up. Tick the Allow Remote Assistance connections to this computer. Click Apply and then OK.
Step 3: Now, we will be able to connect to this VM remotely. Use a USB device and connect it by enabling an RDP session.
Step 4: Run the mstsc.exe command or search “Remote Desktop Connection” on the search box to open the Remote Desktop Connection window. Click Show Options, select the Local Resources tab, and press the More button.
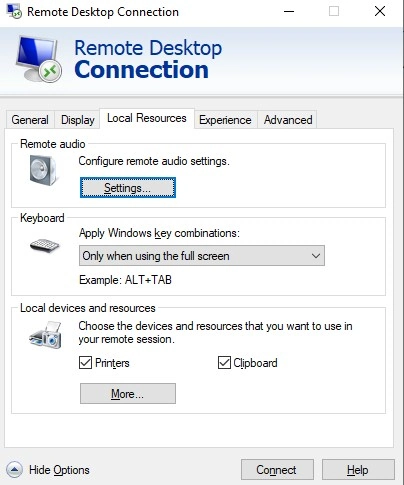
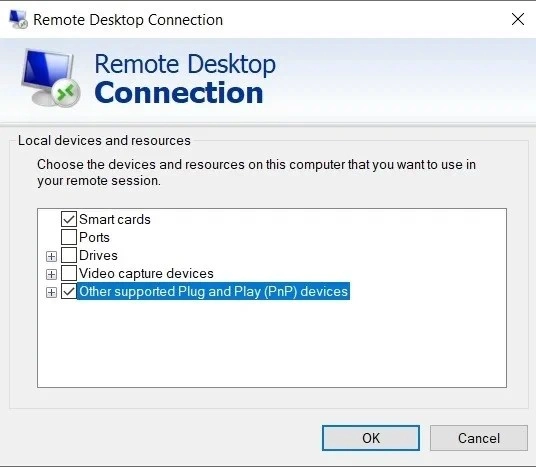
Step 5: The new menu will allow you to connect to new devices and resources now. You will find USB devices under the Plug and Play devices category. Click OK once you’re done with the settings.
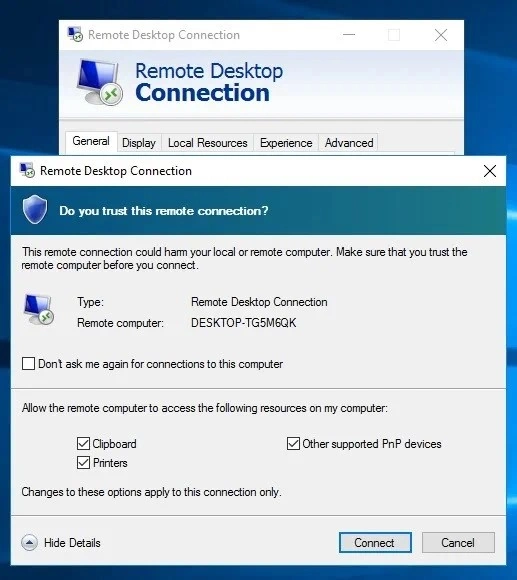
Step 6: Now, click Connect to initiate an RDP session. You will be asked for a final confirmation. Click Connect once you confirm everything.
Step 7: Now, you have successfully made a connection between your USB device and VM! However, make sure there’s a stable network connectivity as it relies on remote connection.
Hyper-V USB Passthrough with Enhanced Session Mode
Apart from the above-mentioned requirements in the last section, Enhanced Session Mode requires one extra requirement-
- The Enhanced session mode policy and Enhanced session mode settings should be enabled. Enhanced Session Mode is only supported on generation 2 VMs.
So, if your VM and devices fulfill those requirements, you can start with the main process-
Step 1: First, connect to the computer that’s hosting a VM.
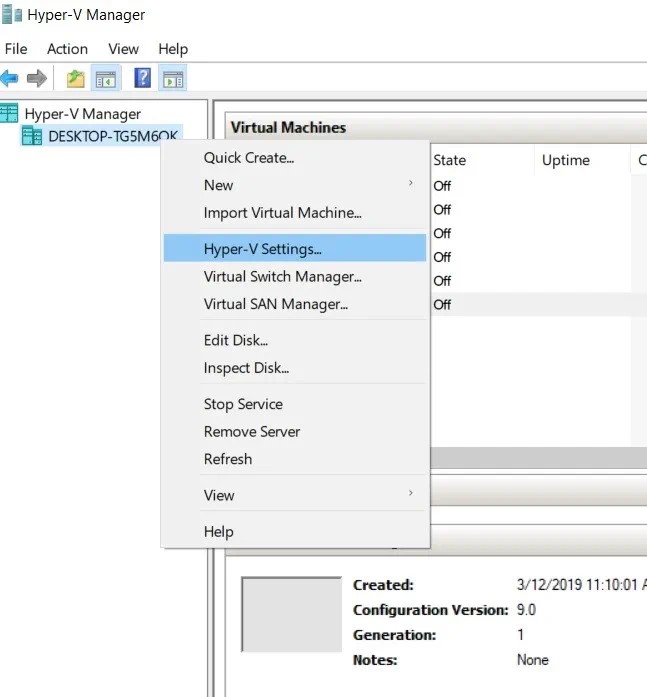
Step 2: Open your Hyper-V Manager app and click on the Hyper-V settings.
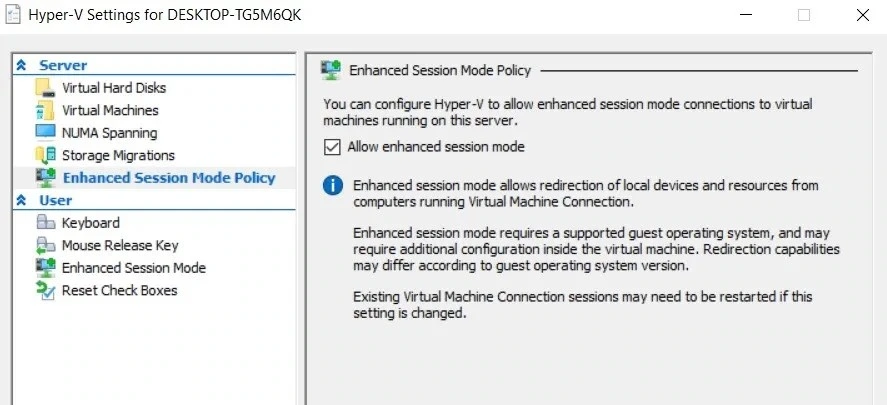
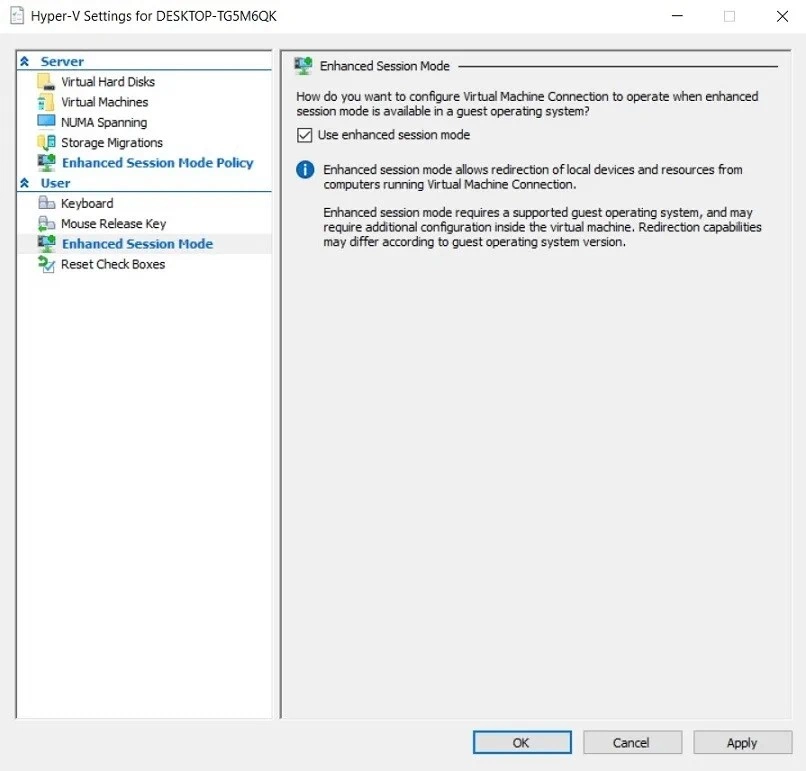
Step 3: Find the Enhanced Session Mode Policy in the Server section and tick the allow enhanced mode session.
Step 4: Right down the server option, click on Enhanced Session Mode, and tick the Use Enhanced Session Mode. Click Ok to save the changes.
Step 5: Open Hyper-V Manager and start the VM.
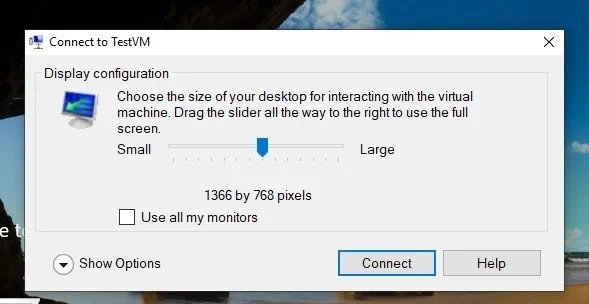
Step 6: Before logging into the VM, a pop-up named “Connect TestVM” will come up. Click Show Options to extend the set of configurations for future connections to this VM.
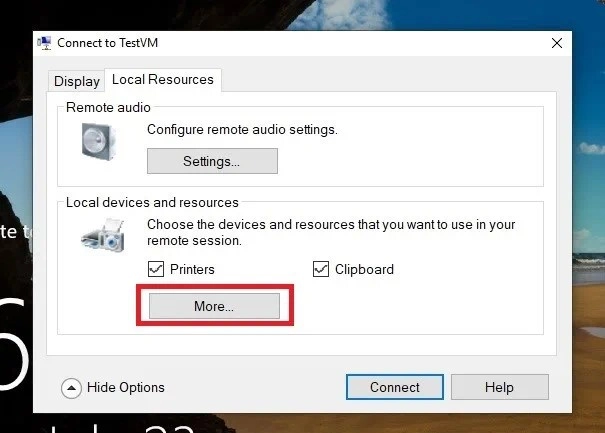
Step 7: Choose Local Resources and click on the More button.
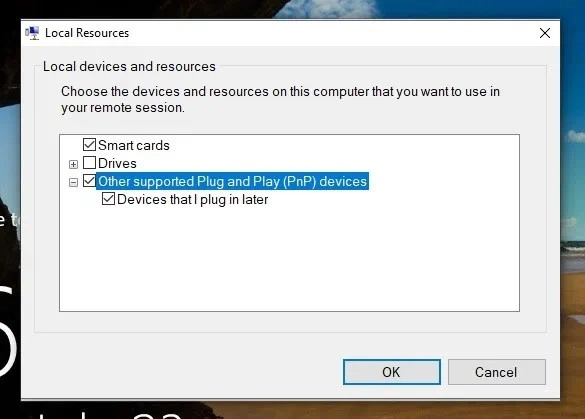
Step 8: To enable VM access to a local USB device, check the box “Other supported Plug and Play (PnP) devices”, as well as the box underneath highlighting “Devices that I plug in later”
Step 9: In the last section, you can save these settings for future connections and then hit OK to finalize the connection.
In these two methods, you can easily enable the Hyper-V USB passthrough and connect your USB device to your VM!
Conclusion
While there are other methods you can follow, these two are comparatively easier and less dependent on external software. So, now, you will also be able to connect a USB device passthrough in Hyper-V!