
How to Remove ‘System Requirements Not Met Watermark’ in Windows 11
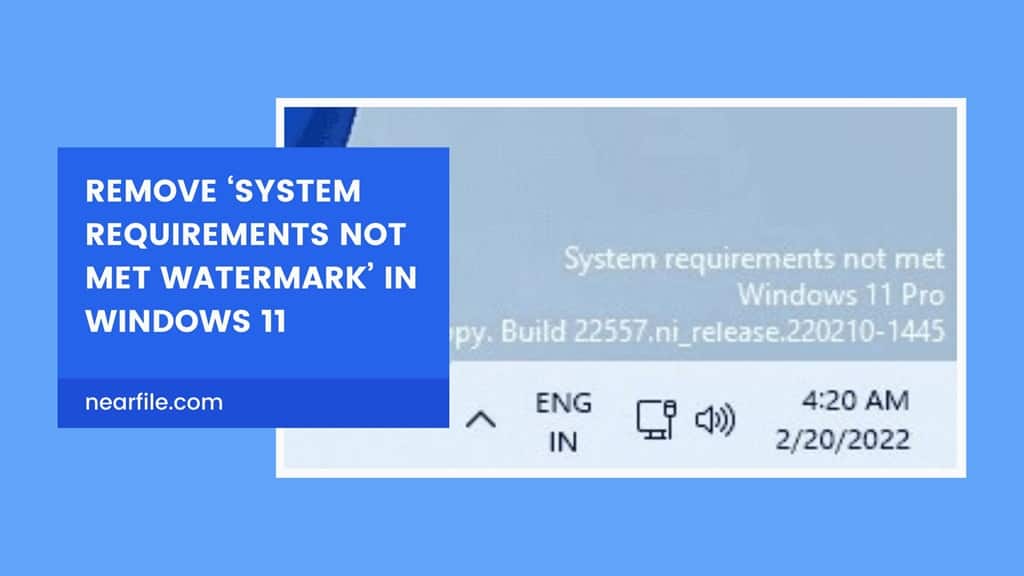
Table of Contents
Windows 11 has introduced a bunch of new features and highlights from the previous iterations of Microsoft OS. However, with great new additions comes a new set of problems! And one of the notable problems that users of Windows 11 are noticing is the ‘System Requirements Not Met Watermark’.
Table of Contents
In this guide, we will address why it happens and how you can solve it within minutes! So, let’s not waste any more time and get started.
Why Does the ‘System Requirements Not Met Watermark’ Only Show Up on Windows 11?
Compared to previous Windows versions, Windows 11 sets tough and solid hardware framework regulations. Because of that, if your current hardware configuration does not meet the Windows 11 requirement, then the watermark persists.
So, basically, if you have very old PC components like CPU, RAM, or hard drive, then it will fail to pass the standard requirement of Windows 11. While the system requirement watermark will constantly bug you, it’s still not a major concern as your PC will run smoothly enough.
Now, let’s look at how you can remove it completely even when you don’t meet the requirements.
How to Remove the Watermark on Windows 11?
You can easily remove the System Requirement Watermark on Windows 11 with Windows Registry Editor. Or, you can use the group policy section to forcefully hide the system requirements message.
Let’s check out both of these methods in full detail to remove the message once and for all!
Method 1: Using Registry Editor
Before you begin with this method, it’s best to keep the following notes in mind-
- Create a restore point or backup of your current Windows 11 system so that you can revert if needed.
- Don’t use any heavy application or device with your computer.
Now, let’s get to know the procedure-
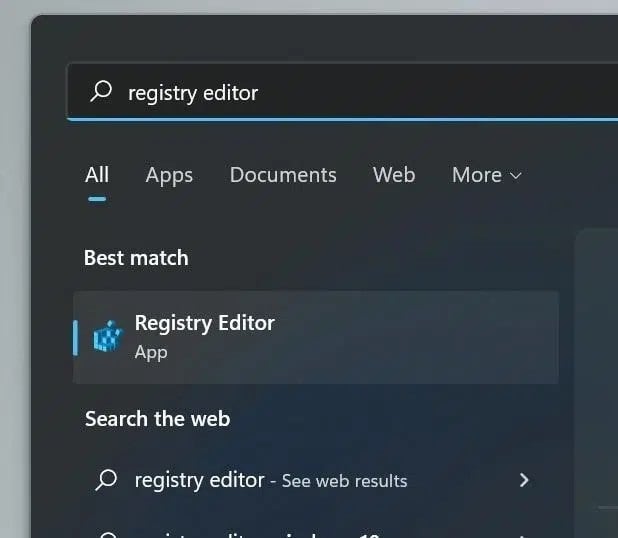
Step 1: Go to the search menu on Windows and type “Registry Editor”.
Step 2: Press Yes on the User Access Control window to continue.
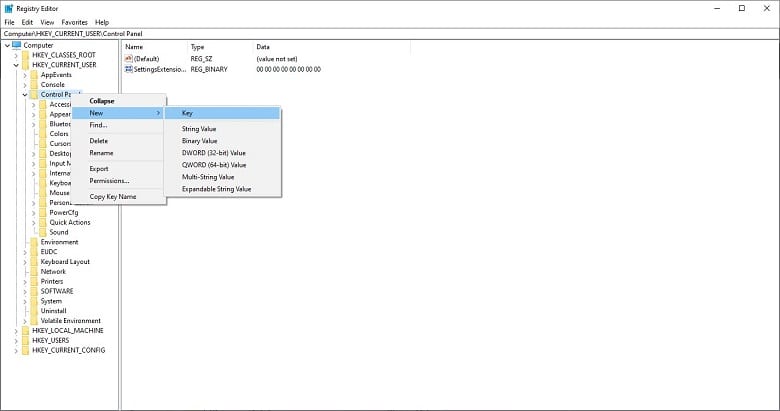
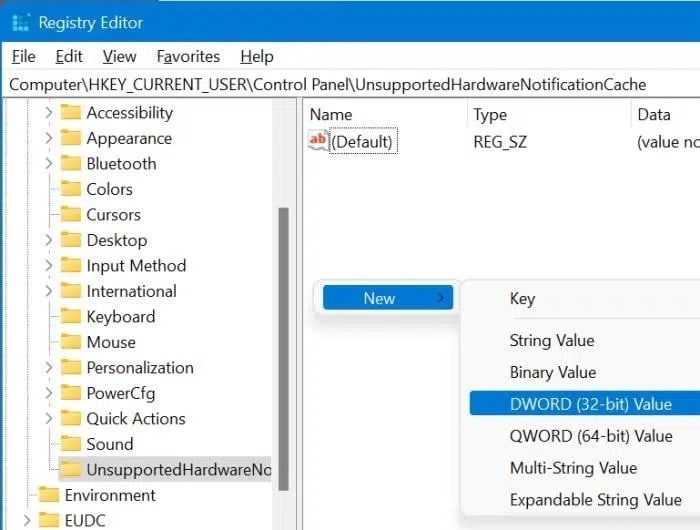
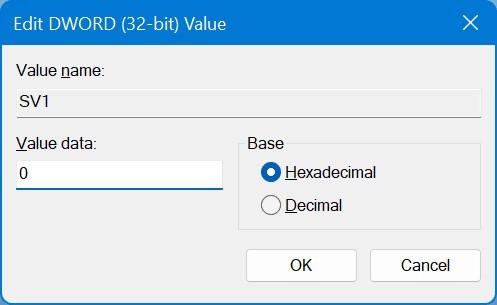
Step 3: After the Registry Editor is launched, go to HKEY_CURRENT_USER\Control Panel\UnsupportedHardwareNotificationCache. If you can’t find the folder, then Right click on the Control Panel tab and create a new key named UnsupportedHardwareNotificationCache.
Step 4: Press the right-click button for the UnsupportedHardwareNotificationCache key and select DWORD (32-bit) Value. Name it SV1 if you are running Windows 11 stable build, Beta, or Release Preview. If you are on an Insider build, rename it to SV2.
Step 5: After creating the file, double-click on it and change the value to 0 and you’re done! Restart your PC and you’re good to go.
Now, the message prompt will never come back again, and you can enjoy your fresh Windows 11 without any issues.
Method 2: Using Group Policy
You don’t have to keep a backup for this method as it’s safer and does not have any effects on your system apps.
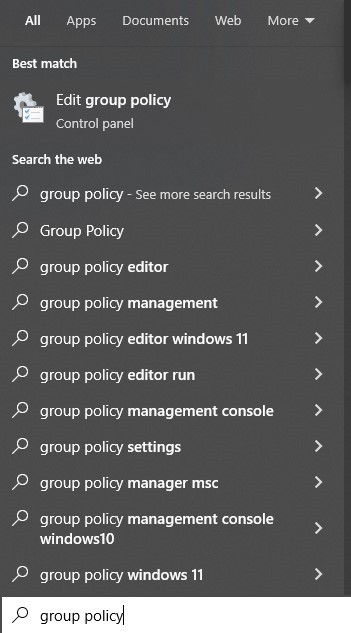
Step 1: Open the search bar type “group policy” and click on the control panel option.
Step 2: Open the settings menu and go to Local Computer Policy > Computer Configuration > Administrative Templates > System.

Step 3: From there, enable the Hide messages when Windows system requirements are not met. Once enabled, you won’t have to deal with those pesky notifications ever again!
Final Words
So, there you have it. Now you can enjoy the playful and eye-pleasing interface of Windows 11 without that annoying System Requirements Not Met Watermark! However, try to keep your hardware updated so that you don’t face any issues in the future!